Turn Your Garage into a Perfect Mancave or a Home Gym
Have you been looking for different ideas on what you can convert your garage into? Do you want that extra extension of your house to be useful for more than just a storage unit? Then we have the perfect article for you. We will give you 2 different ideas for a hand new room that will get used daily verses only during spring cleaning.
6 Steps to Turn Your Garage into the Perfect Mancave
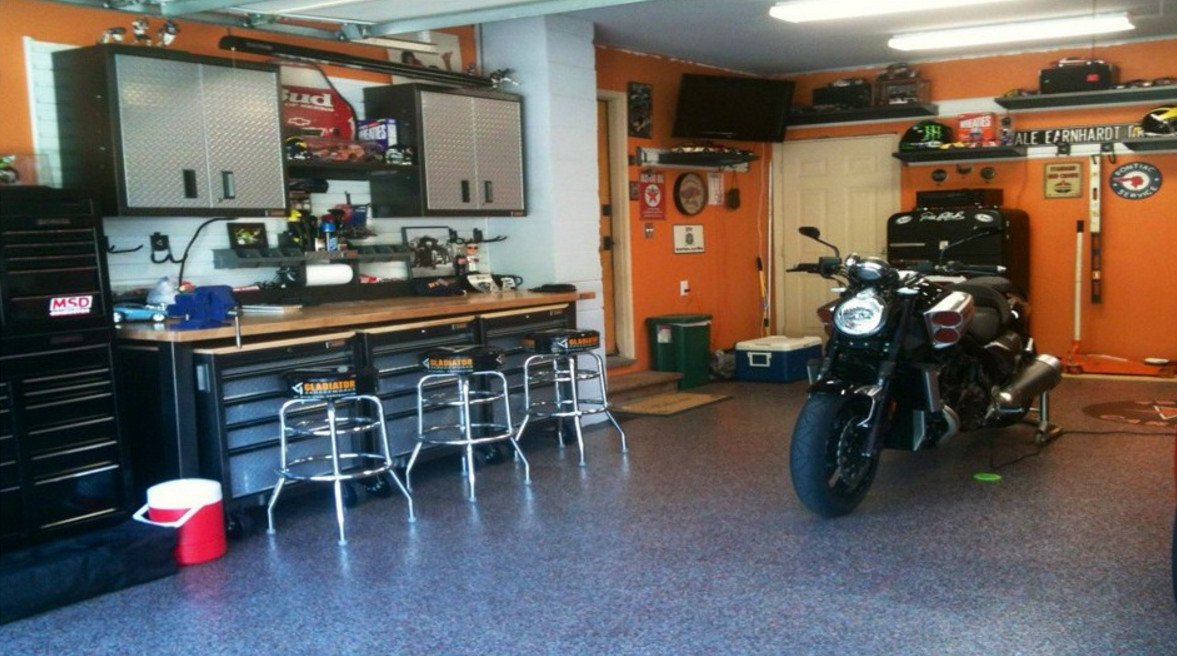
The mancave has been around as long as there have been men and caves. In recent years, however, this tendency for guys to take otherwise little used space and transform it into their own personal Fortress of Solitude has received a lot of press and spawned entire industries dedicated to the practice. Below we’re going to take a close look at the steps required to transform your garage into the kind of place where beards are grown, laundry is not a priority and there’s always a game on the big screen TV.
How to Turn Wasted Space into Testosterone Valley
Sociologists, philosophers and therapists all have their carefully worded explanations about the phenomenon of the mancave. If you’re a real man, however, you couldn’t care less. What you care about is cold beer, fat chairs and 24 hour sports. The following steps to creating the perfect mancave assume that you’ve already decided how you want the finished product to look.
- Step 1: Roughing it in - The first step in creating the ultimate mancave is roughing in the space. This means any unfinished walls need to be finished, the drop ceiling needs to be installed, the walls and ceiling need to be insulated and wiring has to be extended to the new outlets and the site of any new light fixtures. While most guys appreciate the awesome utility of the concrete slab in the garage, it’s probably not going to be good enough for your new mancave. Flooring solutions range from wall to wall carpeting to creating a new floor over the slab and installing radiant heat.
- Step 2: Lighting - Most garages fall pitifully short when it comes to lighting. They have one light on the garage door opener and that’s about it. So now’s the time to add the lights and switches you ran all of those wires for. This means your recessed lights, mood lights and pendants for over the poker table and the bar. And for the love of God man don’t forget the dimmer switches!
- Step 3: Painting - Once the walls, floor and ceiling are finished and the lights, outlets and switches are in place it’s time to paint. Whatever you do though don’t put too much stock in what professionals say about the right color. This is your mancave after all. The right color is the color you want to see. So if you want to paint your mancave Celtic green or the purple and gold of the Lakers go for it. Your buds will be awestruck and that’s all that matters.
- Step 4: The Bar - The bar is as important to the mancave as light and air. Ideally it should be long enough to seat at least 3 and be oriented so that when your buddies are seated at the bar they don’t have to swivel more than 90 degrees this way or that to see the big screen TV. You should have installed outlets in the wall behind the bar to accommodate the fridge and any other appliances and there should be shelving next to the fridge to house your selection of adult beverages. Glasses can be stored on the shelves under the bar.
- Step 5: TV and Music - The wide screen TV is the one non-negotiable item in a mancave and must be placed so that it can be viewed by anyone seated anywhere within the cave. There’s no excuse for missing a walk-off homer in the playoffs because you couldn’t see the TV from where you were. You’ll want a state of the art satellite or cable system jacked into that TV with as many sports channels as current technology will allow. A movie channel or two might be fun too. You’ll also want to install an ear-splitting surround sound audio system, though you may have to dial back on the ear-splitting part to mollify the neighbors.
- Step 6: Furnishings - Finally, you’ll need at least 1 fat recliner along with as many other ultra-comfortable chairs as space will allow. If there’s room you should seriously consider a pool table as well. All chairs in the mancave should face the TV so you can howl with delight or despair when your team makes or misses that field goal to win the Super Bowl or Grey Cup. The walls should also have plenty of art. And by that we mean things like a framed photo of Jordan’s winning shot over Utah in ‘98, The Great One hoisting the Cup, LeBron hoisting the O’Brien Trophy or an autographed picture of David Ortiz. Don’t forget the memorabilia either. And cars. Lots of posters of high performance autos.
Tips to Help You Convert Your Garage into a Home Gym
Your mancave is your birthright. Even a stodgy old blue blood like Bruce Wayne understood that. Keep in mind that the only rule to follow when building out your mancave is that it should reflect your tastes, likes and ambitions. Good luck!
If you have made the determination that you’d like to get in better physical condition but the idea of going to the fitness club several times a week is either unappealing or impractical turning an unused garage into a home gym is an idea that makes a lot of sense. It’s not as difficult as you might imagine if you have any DIY ability and some basic tools along with the time, money and energy necessary to see the project through. So if physical fitness is an important part of your life and you happen to have an unused garage space pay close attention because below we’re going to provide you the recipe for converting your garage into the home health club of your dreams.
- Determine the scope of your project - The first question is: what do you want from your home gym? If you just want a place where you can toss around some free weights with impunity the scope of your project will be limited both physically and financially. If, however, you want something more from your home gym then you’ll need to decide now. You’ll need to come up with a rough design, research costs and determine a budget for the project. That includes not just the cost of equipment but of capital improvements to the space as well, such as a drop ceiling, track lights, ambient heat in the floor, furniture, sound system and/or a full bar. Once you have determined the scope, come up with a rough design and laid out a budget it’s time to move on to the next phase.
- Clean the garage and determine storage needs - Once you know the scope of your project you can determine how much of the garage you’ll have to dedicate to it. Whether it’s a corner of the garage for some free weights or the whole space you’re going to have to take stock of what’s in there now, clean the garage and move any unwanted items out of the way. You may be able to move some to the basement or attic but there are likely to be some that will have to stay in the garage. Set aside all the items that are going to need to stay put and determine how much storage space they’ll require. If your gym is going to be a simple affair you can purchase ready-made storage containers and set aside a part of the space for them. If you are going whole hog you can refine your rough design to include ample, built in storage capabilities.
- Build out the space - If you are simply dedicating a corner of the garage to some free weights and a stationary bike now’s the time to clear it out and spruce it up so that it’s clean and comfortable and ready to accept equipment. You may want to lay down carpeting in this part of the garage as well. If however you are transforming your garage into the equivalent of your own personal fitness club now is the time to build it out. Depending on how deluxe your modifications you may have to hire a contractor. If you are determined to do it yourself you will need to secure any necessary building permits and arrange for inspections as well. Either way this is the time to build out the space.
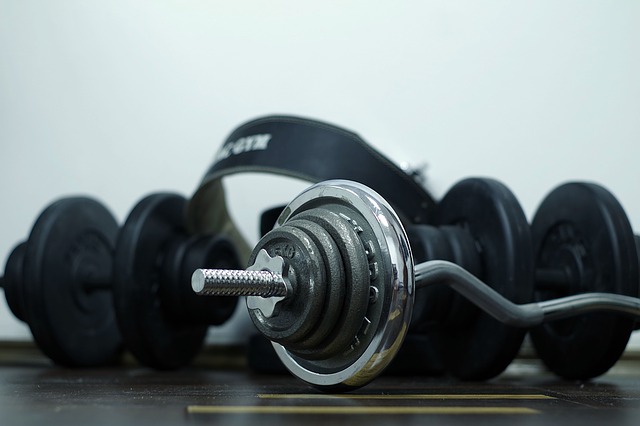
- Purchase equipment - While the space is rounding into form it’s time to purchase the equipment you’re going to need. If you are determined to keep things simple your list of equipment will be a short one. For those who want something more here is a list of common home gym items to consider.
- Power rack - This is baseline equipment for any serious home gym. Make sure your power rack has a built in bench to maximize your exercise options.
- Free weights - No power rack is much good without a full complement of free weights.
- Treadmill and stationary bike - To be a well-rounded home gym you’ll need to account for cardio and that means either a treadmill or stationary bike or, ideally, both.
- In addition - Exercise mats, dumbbells and a dumbbell rack, a punching bag, medicine ball, chin up bar, kettlebells and mirrors (to check your posture as much as your progress) should all be part of your deluxe home gym.
- Install equipment and get to work - Once the space is ready install the equipment along with any furniture (if you’re going whole hog). If you installed a fridge stock it with water and fruit juices and get to work.
Your ultimate aim should be to build a home gym that reflects your fitness goals and stays within what is a reasonable budget for you. It doesn’t make any sense to build a pro-style gym if you only go there once a week to lift a few free weights.