Seal a Garage Floor - Picking the Best Type and Sealing it Properly
One of the questions we get a lot when we show up to repair a garage door or a garage door opener doesn’t have anything to do with garage doors. People want to know what we think is the best type of flooring for their garage. It’s a good question and, while we’re not flooring experts necessarily, we do see just about every different kind of flooring during the course of our workday and get to see which ones work and which ones don’t. So below we’re going to look at the different types of garage flooring that we think make the most sense. Then we will give you the best DIY guide to sealing your garage floor properly.
Two Best Types Garage Flooring
There are many different types of flooring you could use on your garage. Which flooring solution is actually the most sensible will depend at least in part on how much you’re willing to pay and what look you’re trying to achieve. To simplify things though we’ve narrowed it down to what we consider the 2 best types of garage flooring based on affordability, versatility and the look of the finished product. Here they are.
Polyurethane Flooring
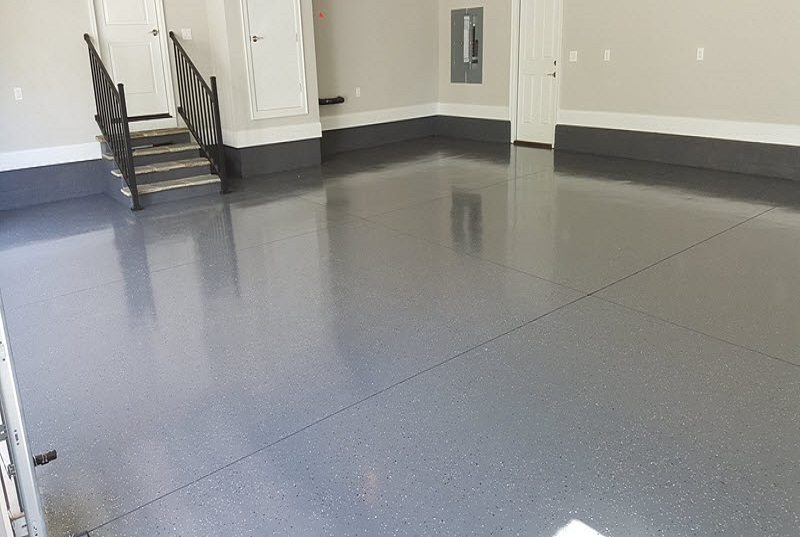
When it comes to durability, practicality and providing protection from the typical hazards of the garage it’s hard to beat polyurethane. This type of resinous coating system has been used for decades in factories, warehouses, auto repair shops and even restaurants because it’s affordable, strong as all get-out and stain proof. If applied properly they also look great and feel great underfoot. They’re also available in a range of colors, are completely waterproof, a snap to clean up and won’t crack or chip if you drop something on them.
This is by far the most widely used type of flooring in both commercial and residential garages for all of the above reasons. Although, as with anything, it’s not without its drawbacks. These include the fact that, although it’s tough and shiny and long lasting, your flooring still has that industrial look to it. In addition, if your garage floor has a ton of tough greasy stains or has a lot of cracks the cost of preparing the floor to accept the polyurethane coating may be prohibitive. Also, while this type of coating will repel any water that drops on it, it’s not very good in dealing with water that wells up from the ground. So if your home is plagued by a high water table and constant hydrostatic pressure your polyurethane coating will likely end up peeling up off the floor.
Polypropylene Garage Tiles
Tiles for the garage floor are available in a variety of materials but from our experience the best type are these hard plastic tiles. They come in a variety of colors, patterns and surface textures so you can achieve just about any kind of look you’re after. And they’re really easy to install. Some even have a bit of rubber mixed in which aids in their flexibility and durability. They typically range in size from 12” x 12” to 18” x 18” and are usually ½” thick (although it is possible to get thicker tiles if that’s what you’d like). These types of tiles use what is called a “peg and loop” system and easily snap into place using either a wooden mallet or your foot. When the entire floor is in place this type of fastening system is very secure. In addition, if a tile somehow cracks or breaks (very rare but it is possible) that tile can be quickly removed and a replacement snapped into place.
The bottom of these tiles is usually hollow allowing for air to circulate underneath and for any water that may make its way under the tile to drain off. This is especially convenient if you have a drain in your garage floor. The water will evacuate down the drain and the circulating air will dry the underside of the tiles once the water has drained away. They’re also stain resistant and, because of their plastic nature, very easy to keep clean. Most tiles like this are UV resistant as well, meaning you don’t have to worry about them fading because the sun shines directly into your garage when the door is open. They’ll hold their color brilliantly. If this type of garage flooring has a drawback it’s that it doesn’t last as long as polyurethane and should you spill oil on these tiles you’ll discover that they’re sometimes difficult to get completely clean because of the textured surface.
The Bottom Line for Types of Garage Flooring
While there are other garage flooring options like rollout matts and even ceramic tiles our experience has shown that the 2 types described above are not only the most popular, but also the most practical, most cost-effective and will produce the most consistently positive results. The next important step in getting the best results for your garage flooring is ensuring that your seal your garage floor properly.
Garage floors aren’t intended to win any design awards or beauty contests. They’re designed to do one thing and one thing only: support the weight of your car or cars. Because of their utilitarian nature homeowners tend to look the other way when the garage floor is the recipient of spilled motor oil and gasoline, spilled house paint or gunk transported in on your tires. While the fact that you’ve spilled some motor oil on your garage floor doesn’t call for tears you do need to be mindful that oil and other corrosives can undermine the viability of the concrete itself leading to cracks, groundwater intrusions or worse. Next, in this post we’ll look at how to seal your garage floor to prevent long term damage.
The Importance of Sealing the Garage Floor
When sealing your garage floor it’s crucial that you choose the right type of epoxy sealant and prepare the floor the right way. Some floor preparation mistakes include:

- Leaving motor oil or other grease on the floor to be coated.
- Removing oil and grease with a degreaser but failing to remove all the degreaser.
- Failing to remove previous sealants, curing agents or other treatments.
- Applying the sealant too soon after pouring the floor.
- Applying the sealant to a floor that’s too smooth.
- Applying cheap sealant to the floor.
That last item is important because many home improvement centers these days are selling DIY garage floor sealing kits that include second-rate epoxies that will either not take properly or will wear through in short order. Typically, such DIY kits will yield a final coating that’s about 1.5 mils thick when ideally you want the garage floor coating to be a minimum of 3 mils thick and preferably thicker. This heftier quality of finish is only available using professional grade products.
Sealing the Garage Floor: Step by Step
Now that we know what type of epoxy sealant we’re going to use we’ll go through the steps necessary to achieve a lasting result.
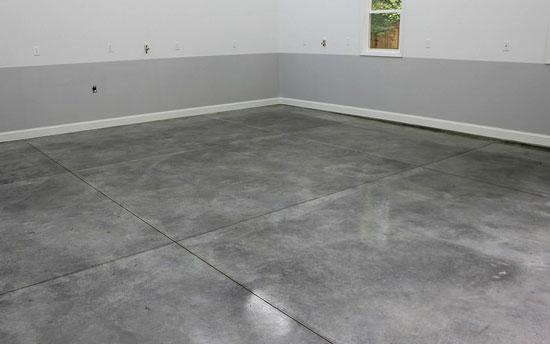
- Make sure the surface is ready to take the sealant: Most garage floor sealing jobs fail due to lax surface prep. If it’s a new floor make sure the concrete is thoroughly cured and etched before applying the epoxy. If it’s an older floor make sure all previous sealants are removed, any oil and dirt is thoroughly cleaned and, if the surface is shiny, use a commercially available acid cleaner to give it some texture. This will help the epoxy get a grip.
- Allow the surface to dry completely: Some masonry cleaners will require that you let the surface dry for several days before you apply the epoxy. Others will be good to go the same day. Make sure you read the instructions on whichever product you choose carefully before proceeding.
- Apply 2 Coats of Sealant: Once the surface is properly prepared seal the floor by applying 2 coats of epoxy sealant. Most sealers can be applied using either a roller or brush and some can be sprayed on. Make sure you avoid creating puddles of the sealant on the floor as this can create problems later. Also, make sure you allow the first coat to dry before applying the second coat. At the same time read instructions carefully and don’t allow too much time to pass between coats as this too will have an adverse effect on the finished product.
- Don’t rush the car back into the garage: While different sealers cure at different speeds some will take as much as 5 days before they’re ready to accept traffic. Again read the instructions carefully before rushing the car back into the garage. Driving on the surface prematurely can cause “hot tire pickup”. What’s “hot tire pickup”? When you drive for an extended period or at high speeds your tires can get very warm from the friction involved. When you park these hot tires on a garage floor that has not completely cured the tire will contract as it cools and actually pull up a piece of the new floor seal.
- Practice proper maintenance: Just as with your garage door opener it’s important to practice sound maintenance habits with your garage floor. As such when the sealer begins to look dull or generally worn out you’ll want to apply a maintenance coat to set things right. Before you do make sure you clean the surface thoroughly using a mild soap and water. Also, remember that newly sealed garage floors can be very slippery, especially when wet.
There you have it. Everything you need to know about the garage floor, how to pick the right type and the right way to make sure your garage floor stays sealed. The important things to remember are thorough preparation of the surface, keeping an eye on the time between coats and maintaining the seal once it’s in place. Oh yeah, and don’t cheap out on the type of epoxy you use ;) To learn more or to arrange garage door repair or installation contactA Better Garage Doortoday.